
These directions will show you how to create a mask that has some of the elements that health care professionals are wanting. It is not as good as a N95 mask. It is the best we can offer at this time.
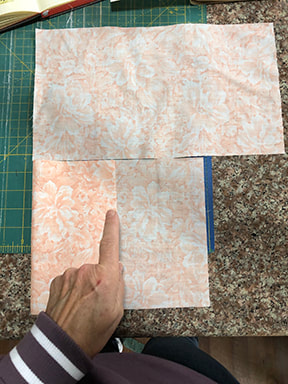
We're using 100% cotton and cotton blend fabric that is as close to 50% cotton /50% polyester
Fabric is cut into 2 pattern pieces
Face area : 14 X 8 inch, one per mask
Ties: 1 3/4 X 44 inch, two per mask
READ ALL THE DIRECTIONS BEFORE YOU START. It's always good to know where you're going before you start a journey.
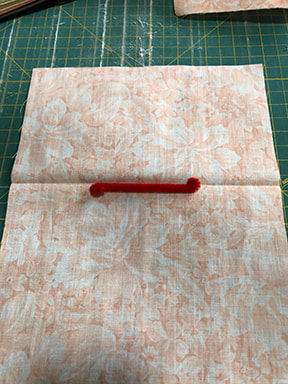
CREATING THE POCKET FOR THE NOSE WIRE.
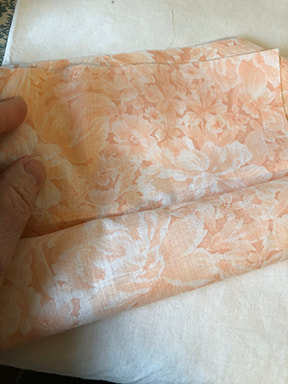
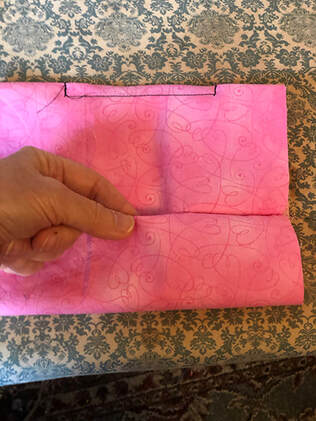
1. Fold the fabric as shown here AND press with an iron.
We're using 100% cotton and cotton blend fabric that is as close to 50% cotton /50% polyester
Fabric is cut into 2 pattern pieces
Face area : 14 X 8 inch, one per mask
Ties: 1 3/4 X 44 inch, two per mask
READ ALL THE DIRECTIONS BEFORE YOU START. It's always good to know where you're going before you start a journey.
CREATING THE POCKET FOR THE NOSE WIRE.
1. Fold the fabric as shown here AND press with an iron.
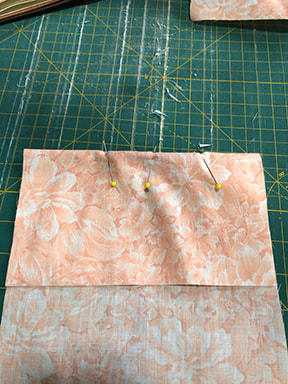
2. Open and center a pipe cleaner or twisty ties in the center of the fold. (If you receive twisty ties in your packet of materials, please, use three per mask to insure it is strong enough to hold shape.)
3. Refold the fabric and pin in place. Sew the pipe cleaner/ twisty tie in place. Besure to back stitch at the ends of the wire to insure that it doesn't slide around.
CREATING THE FILTER INSERT POCKET.
4. Turn the fabric so that right sides are together. AND...
4. Turn the fabric so that right sides are together. AND...
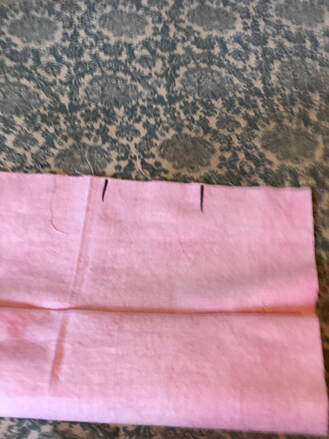
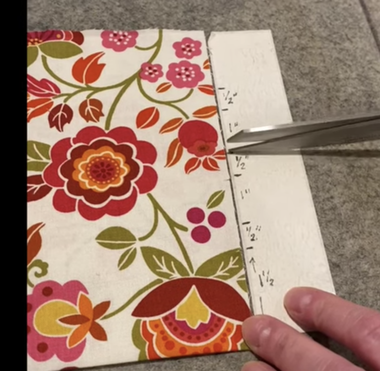
Mark where the pocket opening will be left opened. The opening should be 2 1/2 inches.
5. To save time and thread follow this series of steps. Be sure to back stitch as listed to insure the pocket doesn't tear.
- Begin sewing seam
- Back stitch
- Sew to first mark
- Back stitch
- Loosen tread at presser foot.
- Pull material pass next mark
- Begin seam
- Back Stitch
- Continue seam
- Back stitch at end of seam.
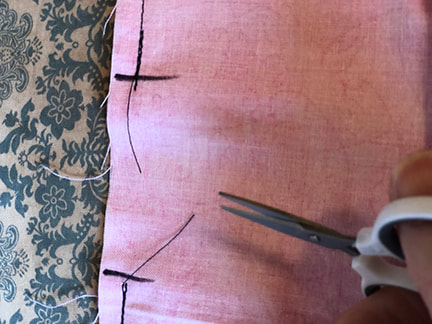
6.. Clip thread between marks.
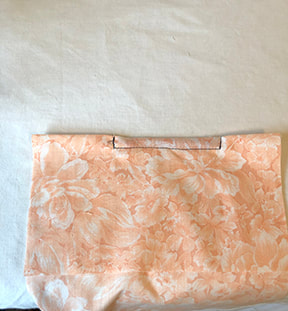
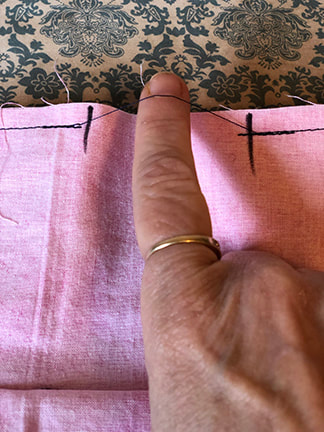
7a. Press with pocket opening centered between edges of fabric. My finger is pointing to the nose wire at the top.
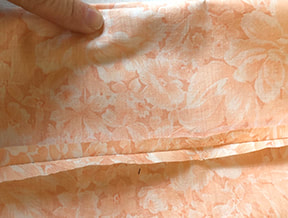
7b. Turn the fabric so right sides are showing. You see the pocket opens between the top and bottom edges.
SEWING THE TIES
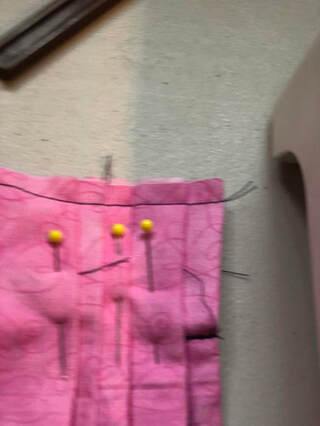
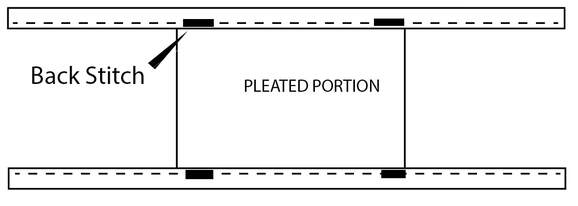
8. Pin three pleats approximately as shown and press.
8. Pin three pleats approximately as shown and press.
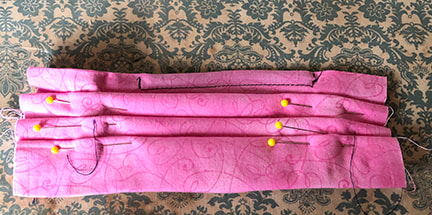
9. Sew in the pleats
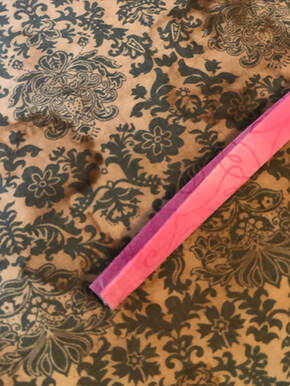
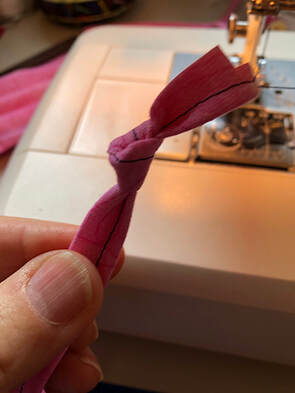
10. Fold and press the long strips of fabric into bias like tape.
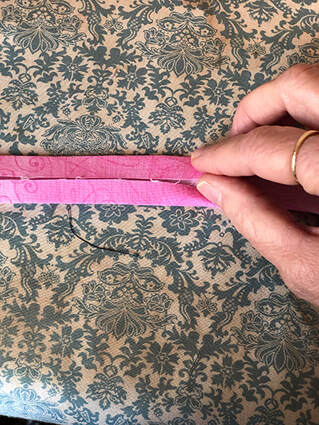
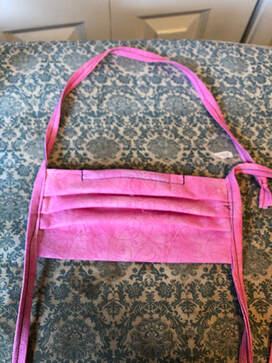
9. Find the middle of one strip and the middle of the narrow side of the mask body.
- Insert the mask body between layers of bias
- Pin in place
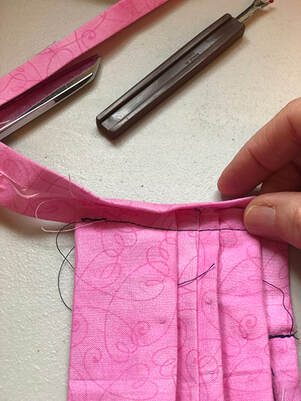
10. Sew at the beginning of the bias strip towards the mask body.
- Sew through the mask body AND be sure to back stitch as you start over the body and end over the body to strengthen the attachment. This area will get a lot of wear.
- Then continue to the end of the strip.

11. Repeat with the second bias strip.
12. Tie the ends of every strip.
12. Tie the ends of every strip.
|
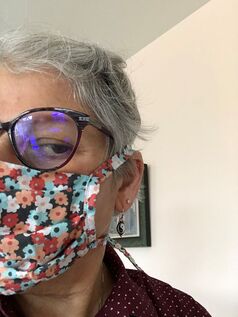
13. The mask is done! Congratulations.
|
